
|
Commenced:
|
01/11/2010 |
|---|---|
|
Submitted:
|
10/06/2011 |
|
Last updated:
|
07/10/2015 |
|
Location:
|
Winston Salem, North Carolina, US |
|
Website:
|
finchj9b.tumblr.com |
|
Climate zone:
|
Warm Temperate |
(projects i'm involved in)
Back to Nottinghill Edible Forest Garden
Project: Nottinghill Edible Forest Garden
Posted by Joshua Finch over 11 years ago
We started here in 2010:
November 2010: One section of our typical American lawn with some potential pathways being imprinted on the landscape
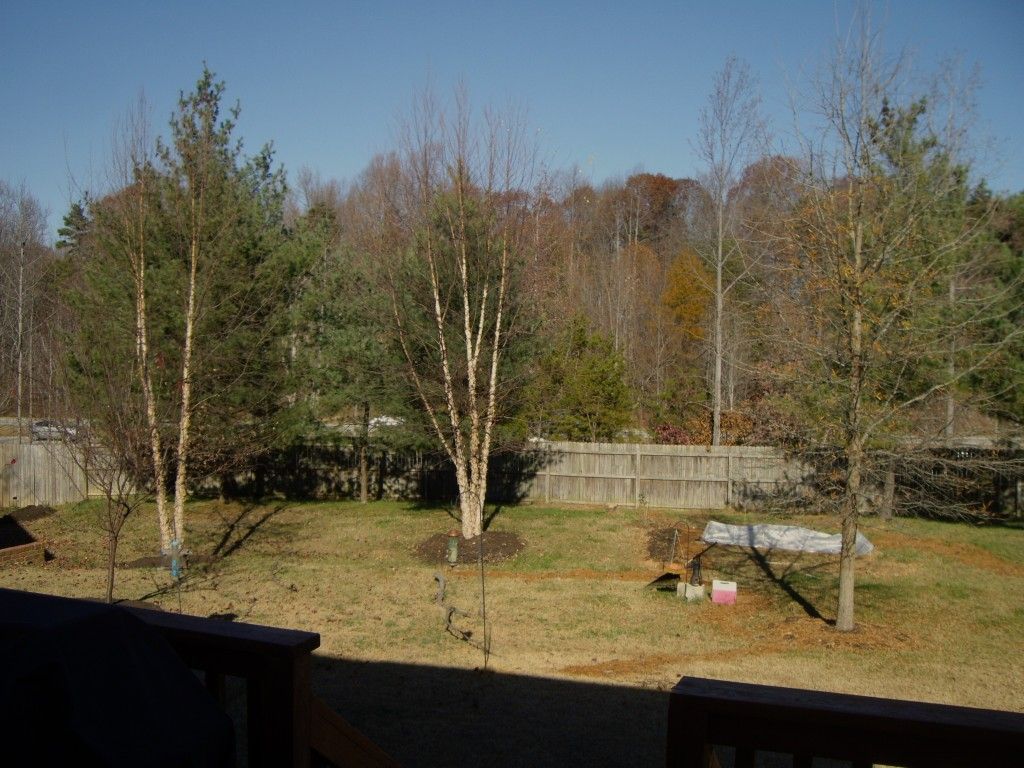
By the end of the sixth slide show, we wind up here:
November 2011: A better view of the area we actually double dug and turned into the "main" garden. Winter and cover crop production in full swing.
Eventually our slide shows will culminate in June 2012 (before I emigrated to Finland):
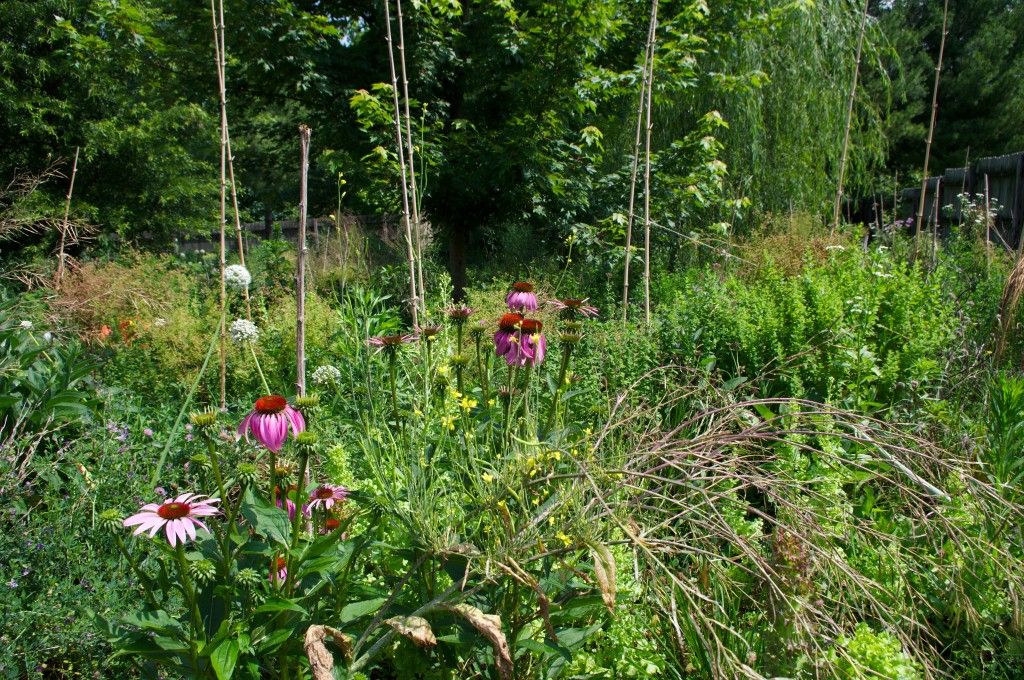
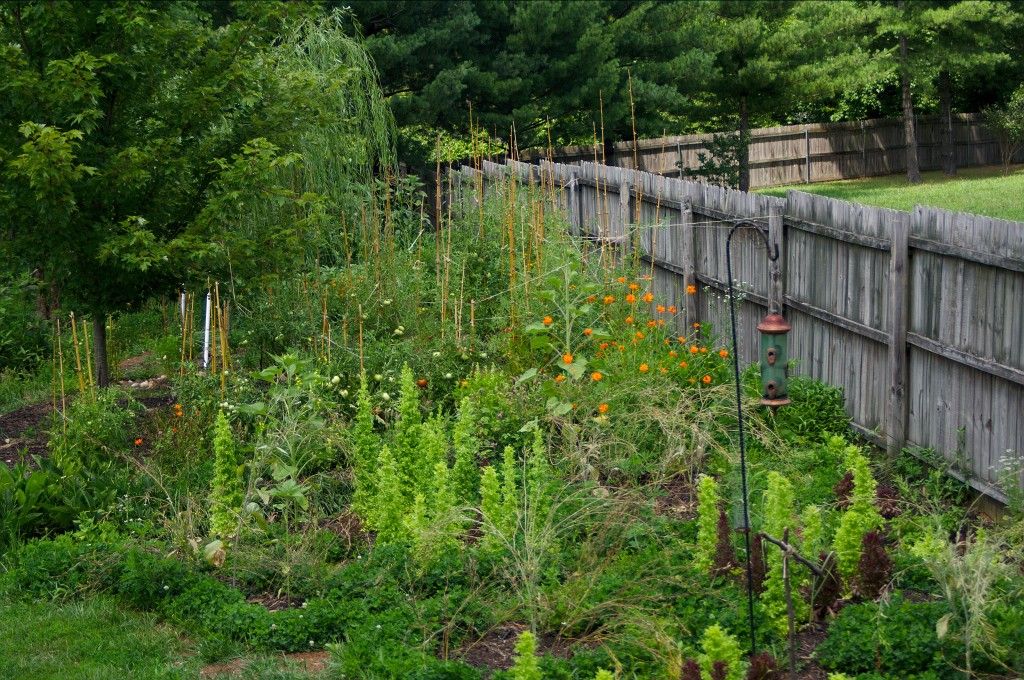
June 2012: Our efforts at cover cropping and introducing a fuller array of nectar sources for beneficial insects are successful.
So how did we go from a typical suburban lawn, which is hardly fit for growing trees in, to the lush scene from June 2012? What were our trials and tribulations? How much effort went into this project? To answer these questions, let us head to the slide shows!
As the videos are quite long, I will put up a synopsis of each along with a couple of stills. While they are long and you can watch them in "HD," they don't actually take much time to buffer- so if you are keen on watching but your connection is slow, try loading them in advance.
November 2010-January 2011
The first slide show is the longest of the six, clocking in at 48:58. A video of this length was necessary in order to introduce the property, climate, and some other basics. Of course, a much longer presentation would be possible if I had wanted- so be happy it is less than an hour! The rest of the videos will be under 35 minutes.
I should also note that I have not taken a PDC, that I am not a professional, and that this was my first garden from planning to implementation. These videos were made for my family, but I figured that someone out there may find them to be worth time- if only to see the transition (and not hear my attempt at narrating something! The narration does get better after the first few videos, but still not 'good').
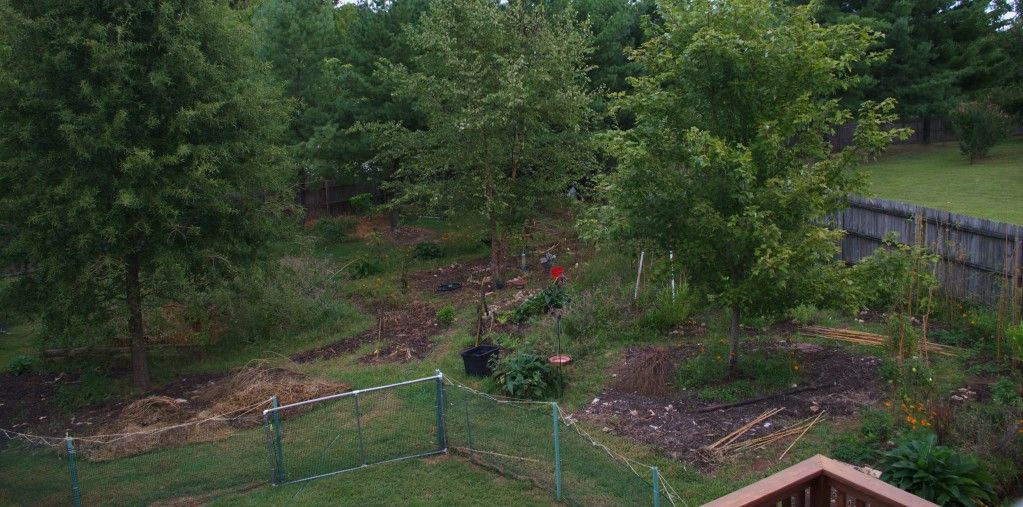
Beginning in November 2010, I decided that as our property was heading towards a "forest" due to the presence of specimen trees, that I would propose a forest garden to my parents. As the trees would eventually make growing grass a pain- as well as the fact that we can't eat or use grass for more than recreation and that grass lawns are usually energy pits rather than energy accumulators- we could intervene to ensure that the trees have a beneficial microecosystem available to them.
By adopting permaculture principles learned from Edible Forest Gardens, we could set our property on a path towards regeneration and sustainability- while reaping edible and aesthetic benefits (alongside others) in the mean time. The first thing to do, and this is of utmost importance, is to observe.
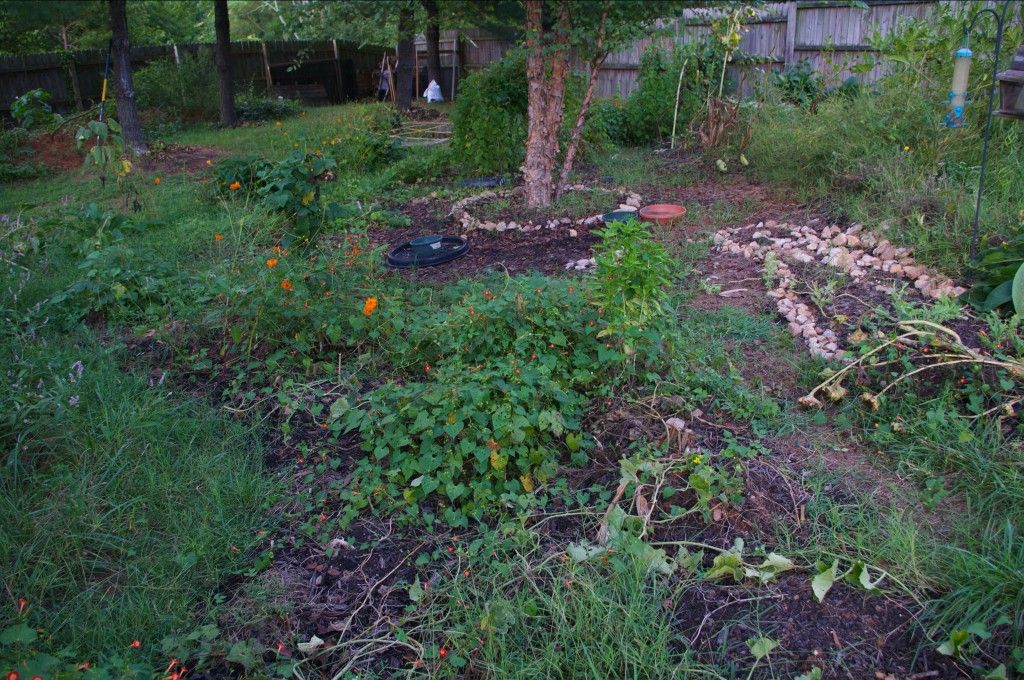
November 2010: Looking east along the berm that was built when the home was constructed. Observing where and how water moves through the landscape is one of the important things to do when implementing agroecological systems. Notice the slight slope of the land.
Water, light & shade, aspects, location of plants and their roots, how huans and animals use the existing landscape- these are all part of a long list of factors we had to examine before making any decisions.
The slide show ends with us having implemented classic permaculture water harvesting techniques: swales and small ponds. Notice that the second swale is off contour! I talk quite a bit about my mistakes in the slide shows...
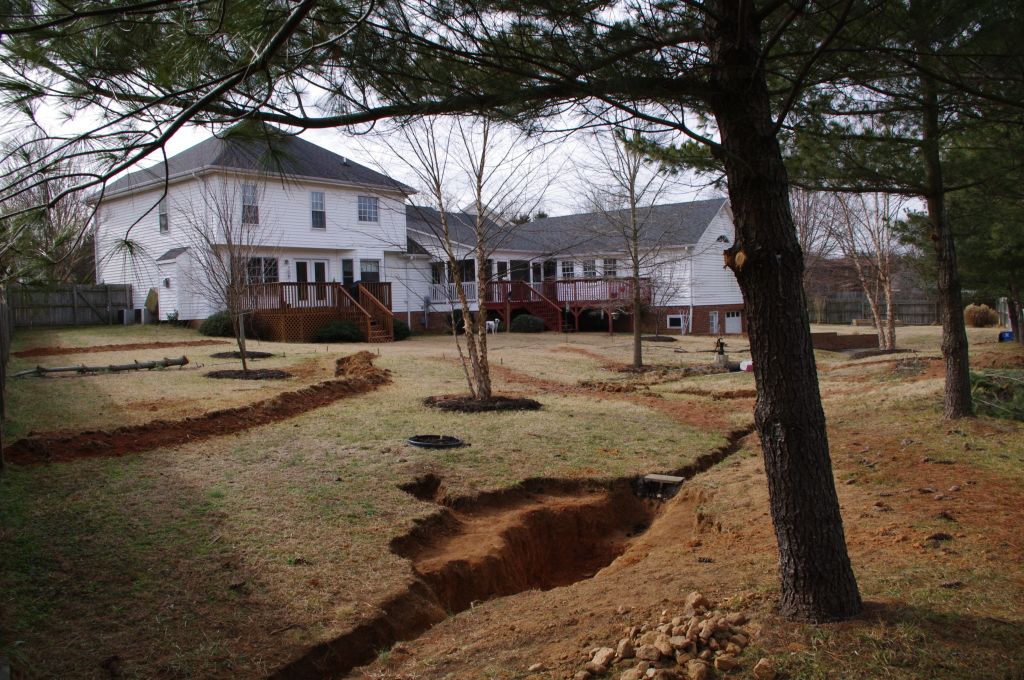
January 2011: Pathways, swales, ponds are all visible when looking south west from under the pines.
February-March 11 2011
Winter progresses in the second slide show. Much shorter, this video is just under 26 minutes.
Our biggest obstacle would be the compacted, abused, and nutrient-depleted clay soil. We knew our soil was depleted ebcause we had soil analysis performed by North Carolina's state laboratory, which is a free service for residents.
After considering our site conditions, we had to choose a path towards remediation. Double digging was our preferred choice as it would allow us to loosen the soil, introduce lime and organic fertilizer (to immediately improve nutrient availability, we'll talk more about this later) deep into the soil profile, and so so as fast as we could possibily work.
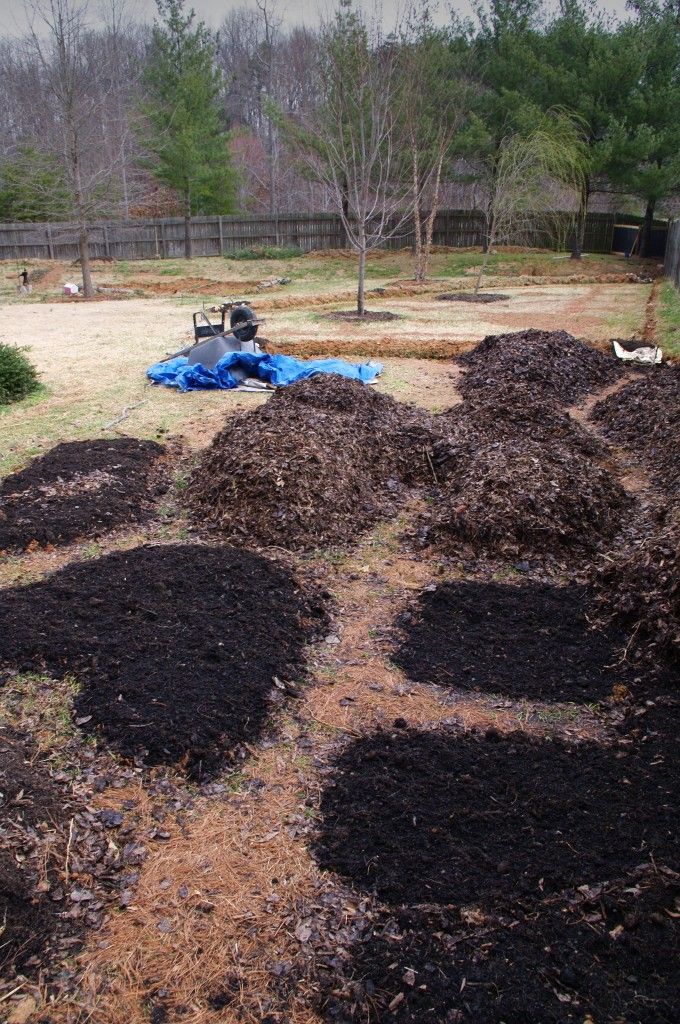
February 2011: Looking north from what would become the green guild- double digging has commenced with newly dug beds being protected with half-finished compost.
Introducing dynamic accumulators along our swales was an important way to begin netting nutrients that would otherwise be lost due to leeching. Russian comfrey cuttings were planted in strategic locations (to be expanded in number later) to begin analyzing the effects of different microclimates on this extraordinary species. In addition to bringing in hard working pioneer species such as comfrey, we also decided to buy a mycorrhizal fungi inoculant to jumpstart the colonization of our garden by these very important species.
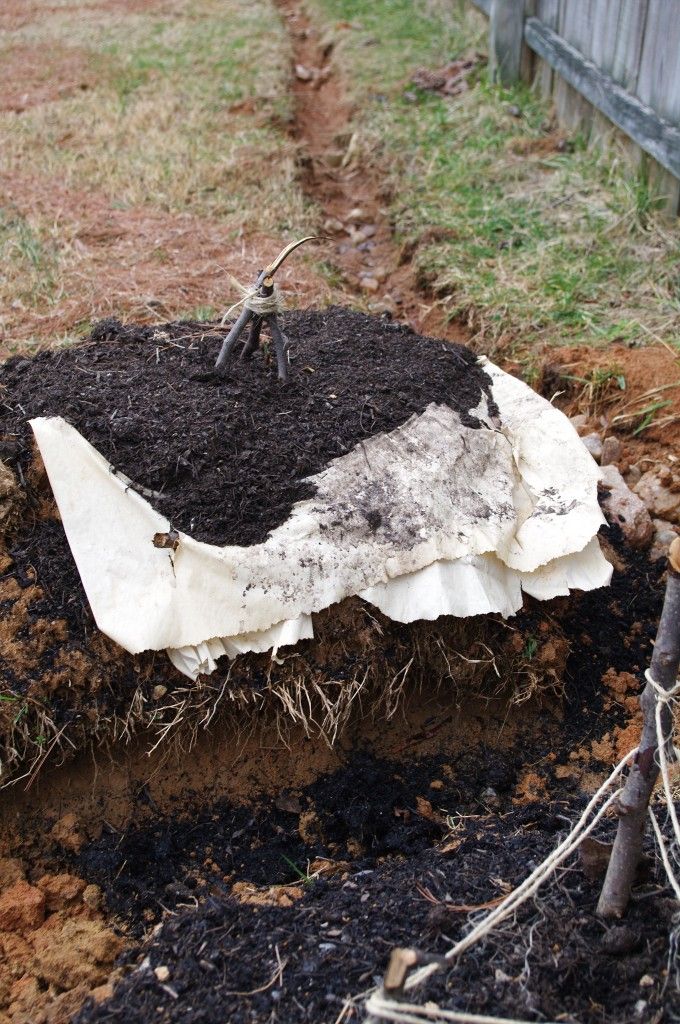
February 2011: Russian comfrey cutting emerging on the first, uppermost swale. Note the ditch in the background- that is a type 1 error I discuss at length in the video.
As the slide show ends, signs of spring emerge.
March 16-May 28 2011
Spring begins and double digging continues. This video runs for 31 minutes and 35 seconds.
I had hoped to have the double digging completed by May 1st, our conservative last frost date. This didn't happen, but we did manage to get the nightshade guild planted out in time. This guild included multiple varieties of tomatoes, peppers, and eggplant (aubergine) along with their companions: lemon balm, basil, oregano, onions, cilantro (coriander), cosmos, some native perennial bee balms, among others.

April 6, 2011. Mostly nightshade guild plants hardening off on the deck before transplanting. When we transplanted, we made sure to inoculate with mychorrhizal fungi as well as foliar feed with compost tea to reduce transplant shock.
Luckily for us, double digging is something that happens only once and never again! Sure we may loosen the soil a bit for a transplant, but never again would we wholesale "till" the soil. There is no reason to with a permanent cover of mulch, living ground covers, promoting healthy fungal networks, and other microorganisms, as well as plants with deep roots combined with an effective network of pathways which allow access to the beds without compaction.
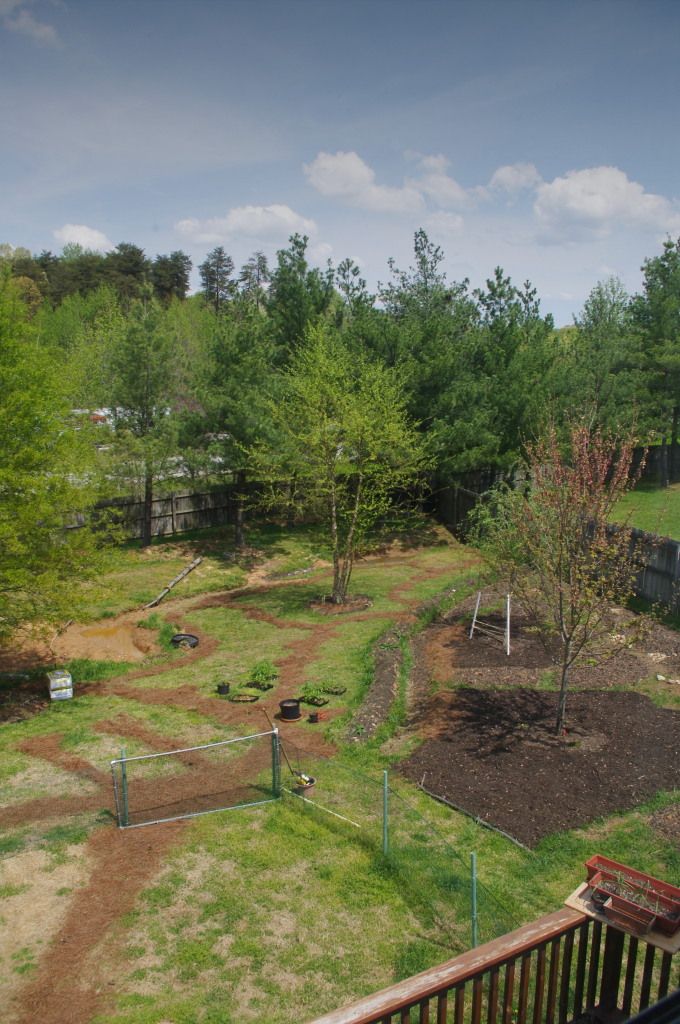
April 15, 2011. Photograph from upstairs clearly showing proposed pathways.
June 2011
Summer arrives with rapid growth in all of our guilds. I talk about using wood mulch in a new garden and the concept of this garden as a stress test. The slide show is 31 minutes and 31 seconds long.
As the temperatures begin to soar, the green guild begins to bolt- transitioning from production to reproduction. Most "greens" tolerate lower temperatures than the rest of our typical annual crops- although our lettuce fared very will with the initial heat.
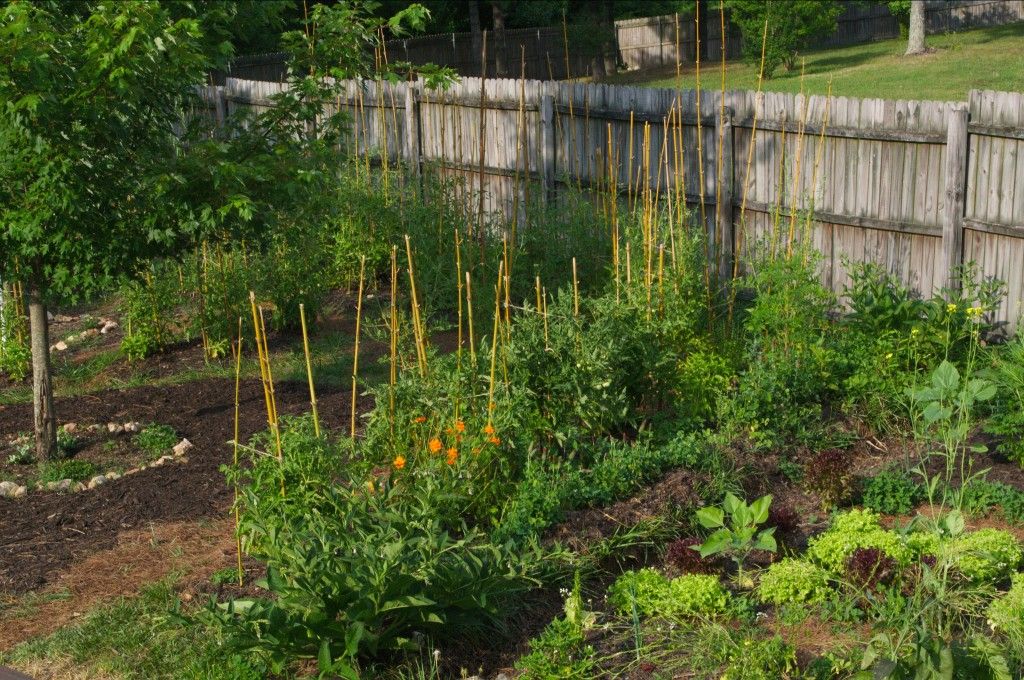
June 15, 2011. On the right is the green guild, separated from the nightshade guild (left) by our first water harvesting swale. Transitions occur in space as well as time in a garden.
We also begin to have great growth in the four sisters guild- sunflowers occupying the role of pollinator magnet! Unfortunately this guild was decimated by a confluence of events both human and natural: transplanting corn and straight line winds (60mph|100km/h strength). (big no no, but I talk about why I did this in the slide show- the beds hadn't been completed in time and the corn was already sprouting from a quick soak [they sprouted in about two days!] so they had to be potted).
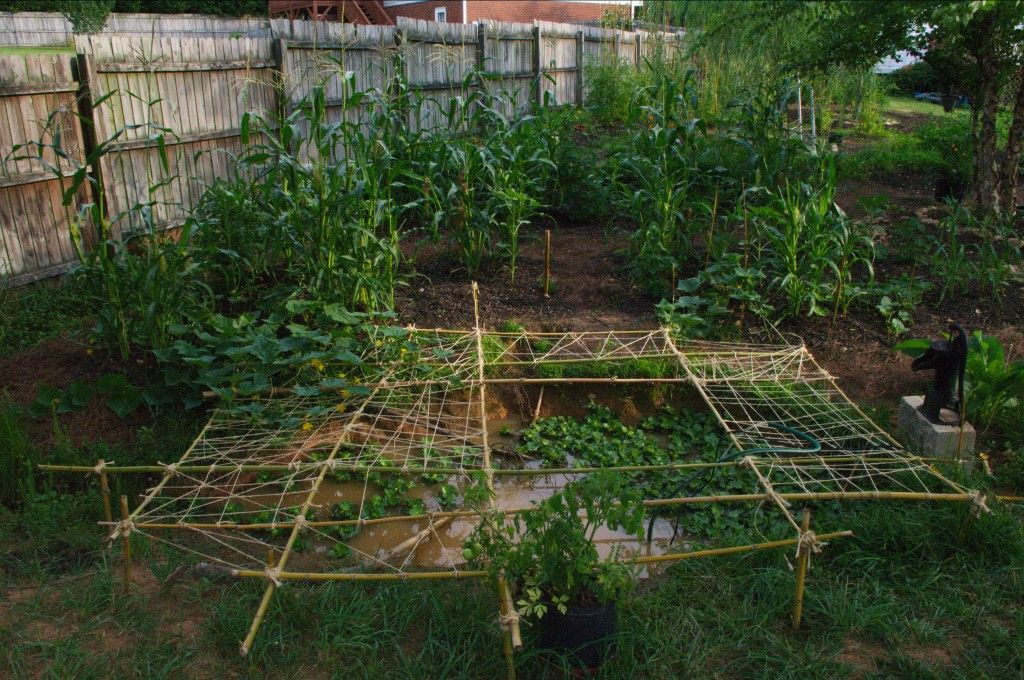
June 15, 2011. Looking south at the upper, small pond into the four sisters guild. The bamboo trellis was intended to be covered with cucumbers- which would prevent some evaporation from the pond. We were struck by powdery mildew so that plan failed, but it was fun to try! The fencing also would keep out predatory birds. The growth in the four sisters guild is pretty good even for transplants, but this is before the winds.
July 2011
I have to back track to June in the slide show to show the storm damage- somehow it escaped my work flow. Growth continues unabated (outside of this guild!), but the lack of rain proves to be a challenge in keeping things alive in the new garden. Remember, we just beginning and we don't have a deep soil structure which allows for water retention- neither do we have a good living mulch to retain water (hence why I talked about wood mulch in the last slide show).
July saw the steady growth of all things in the garden and the stress test was beginning to take a toll on us as well- the constant watering (which we would fetch from the larger pond/pool) and the losses in the four sisters guild were a bit much. Again, we were happy that we hadn't planned on cultivating this many annual plants in the future! We were able to observe the microclimates of the property as well as how different shade patterns affected the growth of our chosen annual species. Actually having shade during the heat of the day proved to be a boon for our plants- photosynthesis shuts down in many plants around 104F}40C.
July 7, 2011. Same transition zone between the green and night shade guilds. The diversity begins to show itself not only in vegetation types, but also forms and fruits- the sheer number of tomatoes that are growing was a pleasant surprise.
July 17, 2011. While the four sisters has taken a beating, the vining crops of melons still grew well- although they didn't fruit as well as they should have. The whole guild devolved into a mess of green vines, but at least some sunflowers remained above the fray.
The sheer amount of growth in the garden, given the state of the soil, amazed us all. It was actually a bit overwhelming!
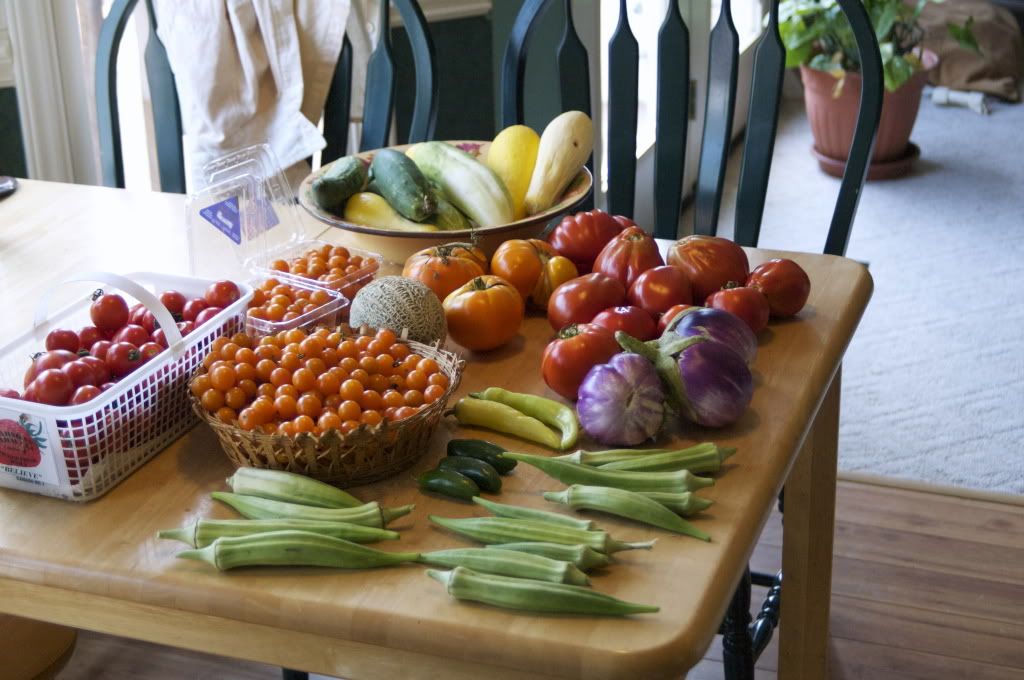
July 30, 2011. My last harvest before heading off to Finland for August, not bad for a first year garden by a first time gardener!
September-November 2011
I return from my visit to Finland to see that the stress test has been overwhelming for the family. I share my disappointments, but also my hope for the future as we wend the first year and bein really implmenting the principles at a deeper level. Whereas before the garden could easily have been seen as a huge example of organic gardening with companion planting, it wasn't until we planted our fall veges and cover crop that the garden really begins to exhibit the signs of being guided by permaculture principles. The run time of this last video for 2011 is 31 minutes and 51 seconds.
This was my least favorite slide show to do.
Grass has begun to encroach on the beds, morning glories that came in our trucked in mulch, and other fast growing pioneer species take advantage of the situation. Again, I was disappointed, but I knew that we were transitioning to a type of garden that would prove much easier to maintain and be more enjoyable in every way.
September 7, 2011. Part of the four sisters guild- no more melons, no ground cover, and morning glories doing their thing. On a positive note- the bed still has its cover of mulch so the soil wasn't exposed to the sun! Note, the decomposing, dead plants are left for a reason- they died a natural death and are safe to remain as overwintering sites and bulky mulch.
There was a lot of work to do. Grass promotes bacterial soils and out competes many plants that we want in the garden. So we had to manually remove most of the grass and get some space ready for fall. Under the cover of all these unwated species, we found that almost all of the perennials we had planted- which are slow growing- had survived! Chalk one up for the natives :)
September 18, 2011. After a few weeks of painstakingly removing morning glory seed pods, we've managed to remove a lot of the grass and other opportunistic plants.
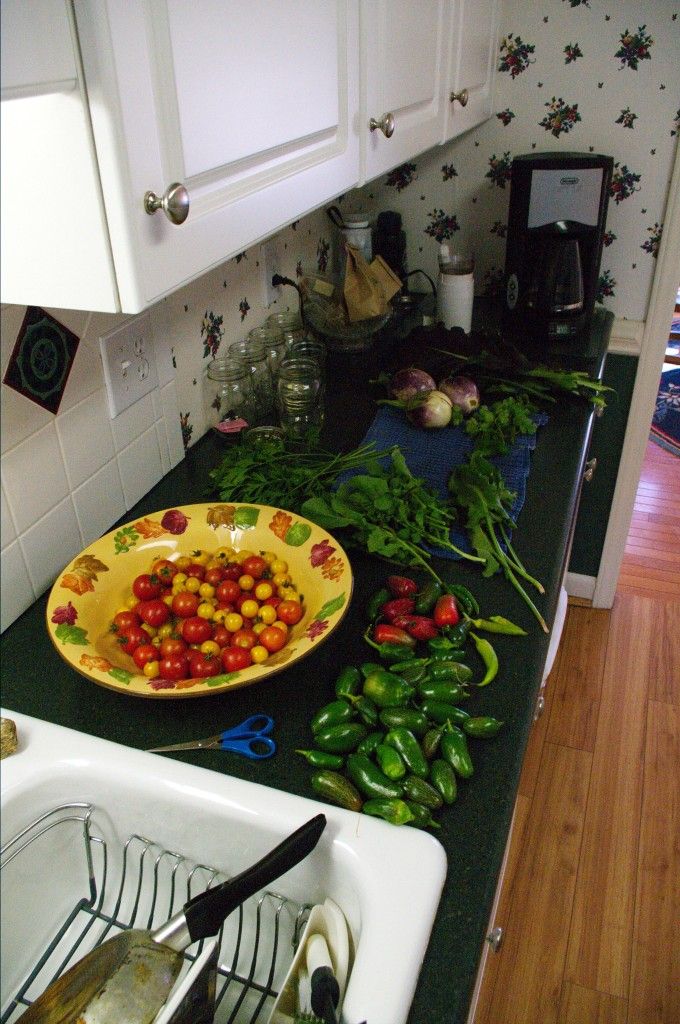
November 9, 2011. November and we are still harvesting tomatoes- this time from volunteer tomatoes that came in the mulch. These tomatoes were almost never watered- they were left to fend for themselves and fruited into the fall. And just look at all of those peppers.
As fall began, we sowed different cover crops in the garden. In the green guild, we retained the white clover ground cover. In the nightshade guild, we interplanted red clover and alfalfa while in the four sisters we planted common vetch- an annual. All of these species are reputed to accumulate minerals as well as fix nitrogen. Into this thick cover crop we also sowed winter crops- cabbages, mustard, arugula, spinach, lettuces, radish, beets, kale, broccoli, peas, and some others.
With this many species growing throughout the winter, we ensured that the soil organisms were recieving a wide diversity of root exudates.
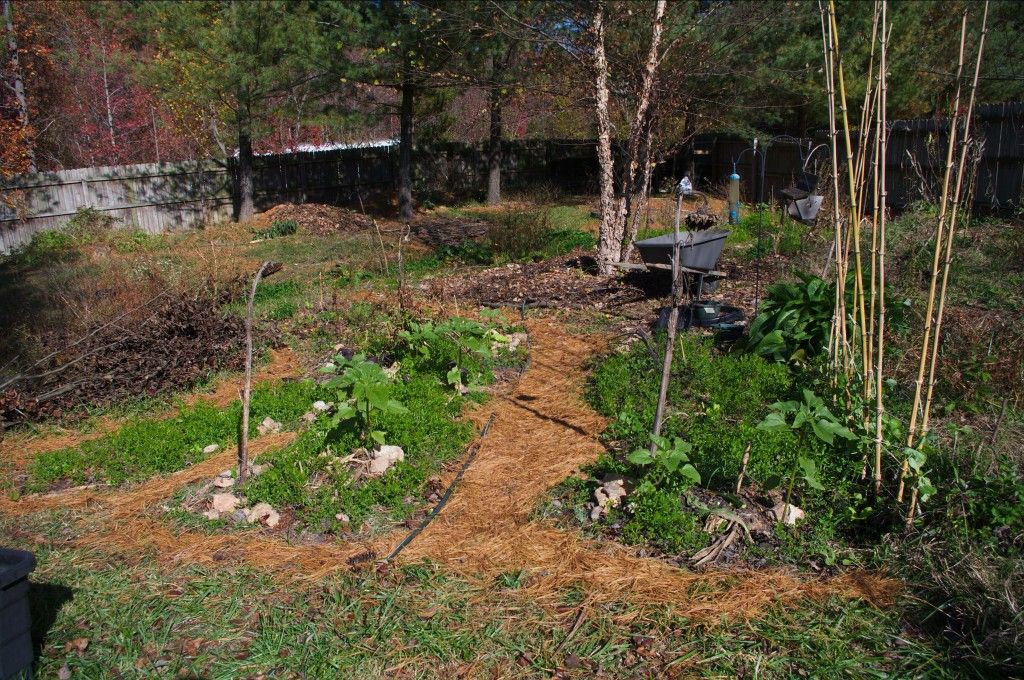
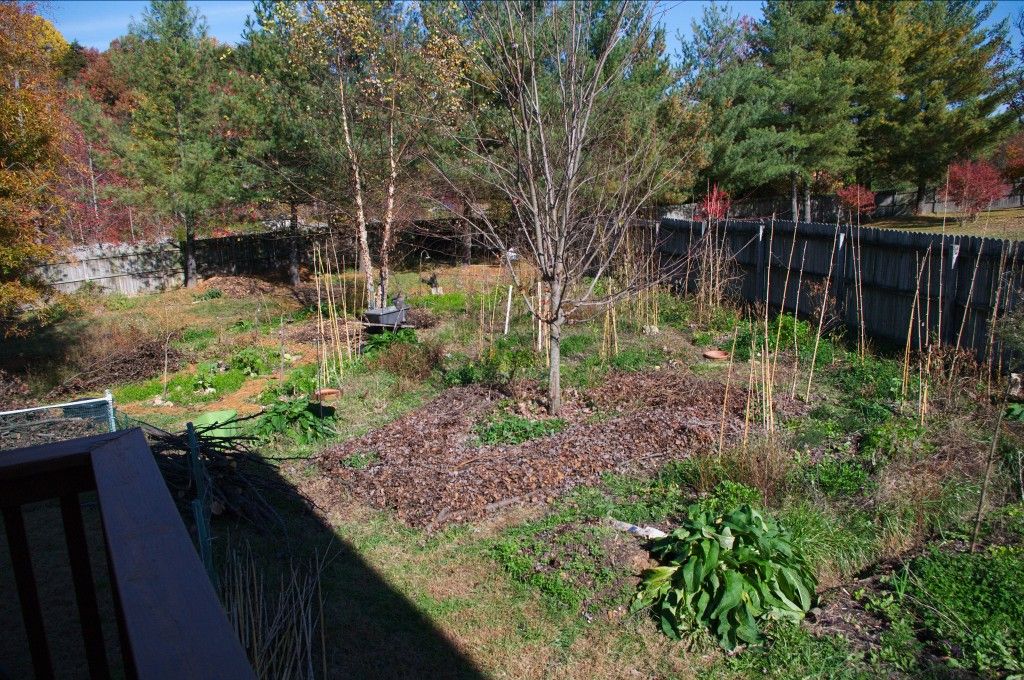
November 9, 2011. The old four sisters. Pretty cleaned up from the mess it became in late summer. Gardening all year in the Piedmont of NC is quite possible.
Conclusion
While a very long post, I wanted to keep the first year in one. I would rather it be that way. Now it can be bookmarked and looked at later instead of having to maintain links to many separate posts. It'll also concentrate comments into one location- if there are any!
I think that even in the fist year we demonstrated that with some planning, research, and execution, even a first time garden can be productive. The best thing is that the first year is just that- the first one. From there we will be accumulating more nutrients, adding more diversity, and increasing the beauty of the system. Things will get better (and they did).
I already have slide shows from January-April 2012 available if anyone wants to see those. Click this link to the playlist for the garden on Youtube. I will have another post similiar to this one when I finish May-June and possibly July 2012 in the coming weeks.
You must be logged in to comment.

Note: The various badges displayed in people profiles are largely honesty-based self-proclamations by the individuals themselves. There are reporting functions users can use if they know of blatant misrepresentation (for both people and projects). Legitimacy, competency and reputation for all people and projects can be evidenced and/or developed through their providing regular updates on permaculture work they’re involved in, before/after photographs, etc. A spirit of objective nurturing of both people and projects through knowledge/encouragement/inspiration/resource sharing is the aim of the Worldwide Permaculture Network.
 |
MemberA member is a permaculturist who has never taken a PDC course. These cannot become PDC teachers. Members may be novice or highly experienced permaculturists or anywhere in between. Watch their updates for evaluation. |
|---|---|
  |
Permaculture MatchmakerOne of these badges will show if you select your gender and the "I'm single, looking for a permaculture partner" option in your profile. |
 |
PDCPeople who claim to have taken a Permaculture Design Certificate (PDC) course somewhere in the world. |
 |
PDC VerifiedPeople who have entered an email address for the teacher of their PDC course, and have had their PDC status verified by that teacher. Watch their updates for evaluation. |
 |
PRI PDCPeople who’ve taken a Permaculture Research Institute PDC somewhere in the world. |
 |
PDC TeacherPeople who claim to teach some version of PDC somewhere in the world. |
 |
PRI TeacherWith the exception of the ‘Member’ who has never taken a PDC, all of the above can apply to become a PRI PDC Teacher. PRI PDC Teachers are those who the PRI recognise, through a vetting board, as determined and competent to teach the full 72-hour course as developed by Permaculture founder Bill Mollison – covering all the topics of The Designers’ Manual as well as possible (i.e. not cherry picking only aspects the teacher feels most interested or competent in). Such teachers also commit to focussing on the design science, and not including subjective spiritual/metaphysical elements. The reason these items are not included in the PDC curriculum is because they are “belief” based. Permaculture Design education concerns itself with teaching good design based on strategies and techniques which are scientifically provable. PRI PDC Teachers may be given teaching and/or consultancy offerings as they become available as the network grows. |
 |
Aid WorkerThe individual with this badge is indicating they are, have, or would like to be involved in permaculture aid work. As such, the individual may or may not have permaculture aid worker experience. Watch their updates for evaluation. |
 |
ConsultantThe individual with this badge is indicating they are, have, or would like to do paid permaculture design consultancy work. As such, the individual may or may not have permaculture consultancy experience. Watch their updates for evaluation. |
 |
Community ProjectCommunity projects are projects that help develop sustainable community interaction and increase localised resiliency. |

